|
Editing and making your own campaigns Getting Started, |
|
Formatting Text and Graphics |
Ready to go
So, you have the great Campaign all set to go. You create the fort file with the editor, and everything looks awsum. You then create your english file and go to test the Campaign. But when you begin the mission, the text is not like you planned, or the graphics aren't there. What happened? Fear not, young MapMaker, examples are on their way...
HTML basics
HTML? I thought we were talking about Netstormoniam stuff? What gives, swelb? Well, the Netstorm programming staff created a way to format text which has some codes that are HTML, and other codes which are unique to the game Netstorm. Let's start with the basics: HTML codes.
Say you have this wonderful Scenario ready to go! You type the following:
[A.]
THE WAR BEGINS
Without war, Nimbians would not know the beauty of peace..
-Nimbian prophet
Too many years of peace have made you soft! It's time for war!
$Button=Review Knowledge,ShowTechnology,55
$Button=Begin,DoNothing,0
Now, that's the way you want it: a title, then a quote underneath the title, a blank
space, an opening intro line for your game, then a ![]() and a
and a ![]() button. But when you go to test out the Map, you see
this:
button. But when you go to test out the Map, you see
this:
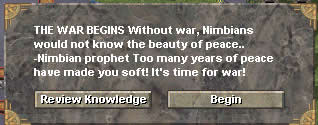
What happened? Why did all the lines run together? Well, with HTML, and Netstorm's Editor, there are certain codes that tell the software when to add a line, when to begin a new paragraph, or when to change colors. These codes are called tags.
HTML Tags
HTML tags are easily identified because they're always within < >. The most common text tags are: <br> which separates lines (line break), <p> which begins a new paragraph, and <h> which doubles the size of your text. Now, using our previous example, let's format it correctly. I also want the title to stand out, so I'm gonna double the size of it.
[Options]
[A.]
<h>THE WAR BEGINS</h><br>
Without war, Nimbians would not know the beauty of peace..<br>
-Nimbian
prophet
<p>Too many years of peace have made you soft! It's
time for war!
$Button=Review Knowledge,ShowTechnology,55
$Button=Begin,DoNothing,0
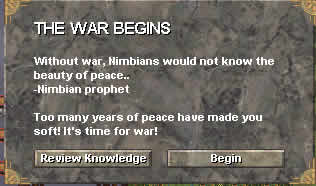
Notice a few things: the first <h> doubles the size of the text. Once text is doubled, it will stay double size until a </h> is encountered. So, in our example, only the top line will be double size.
Next, a <br> is inserted to tell the editor to start a new line. And after the quote, another <br> is added. Wait a second, why don't we need a <br> after the -Nimbian prophet line? Well, because the <p> on the next line can be thought of as <br><br>.
So, how's it look on the screen? Take a peek below:
Nice, you're probably saying, but if you're like me, you're also probably thinking it's kinda dull. No colors. No graphics. Just plain white text. What else can we do with these tag-thingies? Let's see:
Netstormian Tags: text stuff
The makers of Netstorm weren't satisfied with tags that just go inside < >. They said: Let's make some of the tags different. Let's make some of the tags compact! Let's make some of the tags confusing! (well, mebbe they didn't say that, but you get the idea...) Let's have something that's hardly ever used on the keyboard to indicate that it's a tag. And voila! the ~ was used.
For text stuff, the ~ tag indicator uses 1 more character after it to indicate what to do with the text. Right now, we'll only concentrate on changing font colors and styles.
If you're a regular visitor to these pages, then you've probably seen the <a href="advanced_colors.html">Adding Color to Your Campaign (Changing_Text_Colors) Page section. If not, take a quick scan of it now, then come back to this page.
Got all that? Good, now let's continue. Let's spice up the colors a little. In the Title, let's have WAR in Black. Also, all quotes in Netstorm are usually that funky brown-white color. Let's do all of those things. Our code then becomes:
[Options]
[A.]
<h>THE ~kWAR~w BEGINS</h><br>
<i>Without war, Nimbians would not know the beauty of
peace..<br>
-Nimbian
prophet</i>
<p>Too many years of peace have made you soft! It's
time for war!
$Button=Review Knowledge,ShowTechnology,55
$Button=Begin,DoNothing,0
The ~k will make the text black, while the ~w resets the word color to white. Finally, the <i> makes the quote that quote-color. Remember to insert the </i> after the quote, so the color of the text will revert back to white. So far so good?
The screen should look like the picture below, once you start THE GREAT SCENARIO:

That's nice. But, it's missing something. The intro screen above is missing items to make it stand out. It's missing GRAPHIC IMAGES.
The Best (and hardest) for Last: Graphics
Now for the fun stuff: Graphics. Let's see how we can add a few images to our introduction. Images in Netstorm use the same funny tag ~ as colors do, but the image name must also be enclosed in brackets: [ ]. And because graphics in Netstorm are animated, you have to tell the Editor what Frame of the graphics you want.
Hmm... this sounds kinda complicated. And it is. So read carefully. And take notes. And sit up straight! And no talking in class! And...
Sorry, I thought I was back in school... Anyway, the syntax for formatting graphics is: ~[Iimagename.imageframe]. Imagename is one of a whole slew of graphic names for things in Netstorm. For a complete list of image names, and for a more involved explanation of images, check out the Images Imageframe is a number that defines what frame you want to display.
Look again carefully at the syntax above. See the I? Don't forget it when you go try this out on your machine. It tells the software that the stuff inside the brackets is the name of a graphic image.
Getting back to our example, I want to add a sun cannon image on one end of the title, and a rain cannon image on the other end. So, the ultimate sooper dooper intro code will look like this:
[Options]
[A.]
<h> ~[IsunCannon.3]THE ~kWAR~w BEGINS~[IrainCannon.9]</h><br>
<i>Without war, Nimbians would not know the beauty of peace..<br>
-Nimbian
prophet</i>
<p>Too many years of peace have made you soft! It's
time for war!
$Button=Review Knowledge,ShowTechnology,55
$Button=Begin,DoNothing,0
See the number 3 and the number 9 after the image names above? Those numbers were chosen because I wanted to have the cannons pointing at each other. If I wanted them to point away, I'd use the numbers 2 and 4. How'd I come up with those numbers. Through trial and error.
The screen will look like this once the scenario is run:

Now doesn't that look better than just a plain introduction screen?
And that, fellow Nimbians, is the basics of formatting text and graphics.